Hello Stamping Friends,
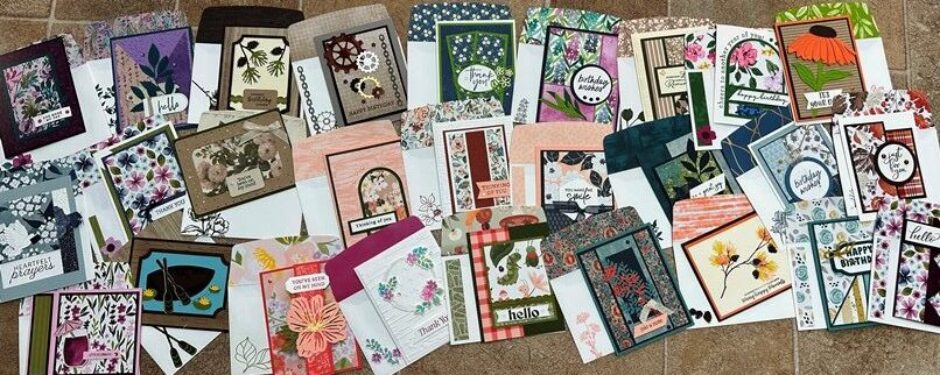
Here are the four cards that you’ll receive when you place a $50 online during March using the host code: RBKS42K7. You’ve seen three of them and I finally have the fourth one finished. It is so cute—I love it as well as the other three.
The beautiful Butterfly Brilliance Collection is featured on two of the cards. It’s a sneak peek from the new Annual Catalog that will go live in May. It’s available to order now. You may see it at www.stampinlady.com by clicking on Shop Now and then Shop Here. You’ll see the beautiful collection in all its glory.
If you’re placing a club order or your order is over $150, and not a club order, don’t use this host code. Your club order will have a different host code and if it’s a personal order over $150, you’ll want to claim the host rewards for yourself.
If you’re a regular customer of mine, you’ll receive your copy of the new catalog in April. If you don’t have your own demonstrator and would like to receive a copy, please let me know and I’ll send one to you.
Please let me know if you have any questions or if I can help in any way: 303-888-1862 call or text. I’m happy to help you place an order if you want me to.
Thank you so much; I appreciate you every day!
Have a great day and many hugs, Pat
Gorgeous Grape Butterfly Brilliance Card

Original by Sarah Cade
This card is very easy as everything is cut for you. It is so beautiful!
Attach the largest piece of designer paper to the card front. Then attach the middle piece to it.
Cut your ribbon in half and use it to wrap around to the back. Scotch tape it in place on the back.
Attach that entire assembled piece to the card base.
Attach the butterflies with glue dots in the middle so that you can fluff the wings.
You have a small piece of Natural Touch specialty paper on which to put your greeting. It doesn’t absorb the ink at all so it takes awhile to dry and it will smear until it’s dry. You might want to use a heat tool to dry it or emboss it with clear embossing powder after stamping. You could also use your StazOn pad, but it will also take a few minutes to dry. Please remember that StazOn will stain your stamps—I wouldn’t use it with the polymer stamps.
Add your diamonds.
Supplies used include:
Butterfly Brilliance Collection, 159408, $71.25, includes Butterfly Brilliance bundle (10% discount), Butterfly Bijou 6 x 6 designer paper, Natural Touch specialty paper 12 x 12.
Or, Butterfly Brilliance Bundle, 10% discount, 155821, $54.75 (includes stamp Butterfly Brilliance stamp set [one large stamp that matches up with dies & dsp] and Brilliant Wings dies)
Itty Bitty Birthdays, 107
Gorgeous Grape card stock
8 ½ x 5 ½
2 1/8 x 2 1/8 (for cutting butterfly)
White card stock, #159276, $9.75 (new white card stock)
5 x 3 ¾
Butterfly Bijou designer paper, 156824, $11.50, 48 sheets, 8 each of 6 double-sided designs
6 x 2 ¼ for envelope flap and small strips for inside and on envelope (Bermuda Bay w/small butterflies)
5 x 3 ¾ background print (printed Bermuda Bay)
5 x 2 middle piece
Highland Heather card stock
2 1/8 x 2 ¾
Natural Touch specialty paper, 2 ¼ x 5/8, 156825, 2 sheets, 12 x 12, $5
Bermuda Bay stamp pad
Highland Heather stamp pad
Ribbon, ribbon on sample is retired & I don’t have any more, you’re receiving a current ribbon
Diamonds
Glue Dots
Black Butterfly Poppy Parade Card

Inspired by Ann Alexander
This one is very easy as it’s exactly as shown.
Assemble the card and then add the red circle and butterfly. Attach the butterfly by the body only so that you can fluff the wings.
Attach the small black piece as shown and then stamp your greeting and attach it with dimensionals.
Supplies used include:
Butterfly Brilliance Collection, 159408, $71.25
Poppy Parade card stock, 142
8 ½ x 5 ½
2 1/8 x 2 1/8
White card stock, #159276, $9.75 (new white card stock)
5 x 3 ¾ 2 each
Basic Black card stock
3 ¼ x 4 ½
2 ¾ x 2 ¾
Butterfly Bijou designer paper. 156824, $11.50
3 x 4 ¼
¾ strips for inside and strip on front of envelope
6 x 2 3/8 for envelope flap
Poppy Parade pad, 142
Stitched Shapes dies, 183
Stitched So Sweetly dies, 179
Fine Art Floral Purple Card

Original by Tamie Ackerson
This card is put together for you.
This is how it was done. I love this card.
Attach the Highland Heather embossed piece to the black card base and then add the designer paper.
Stamp the Highland Heather flower base on the white card stock and then add the Gorgeous Grape layer.
Add the greeting so that you can ensure that you have enough space for it. I stamped the greeting with the Memento black pad.
Add the stem piece stamping with Mossy Meadow ink.
Assemble the layers—there are dimensionals under the smaller black piece.
Tie the ribbon in a knot and attach it with a glue dot. Add your diamonds.
Supplies used include:
Fine Art Gallery bundle, m 33
Basic Black card stock, 143
11 x 4 ¼
4 ½ x 3
Highland Heather card stock, 143
4 x 2 ½
4 ¼ x 2 ¾
White card stock, #159276, $9.75 (new white card stock)
5 ¼ x 4
4 x 2 ½
Hydrangea Hill designer paper, m 19
4 x 3
6 x 2 3/8 for envelope flap
Highland Heather pad, 143
Gorgeous Grape pad, 142
Mossy Meadow pad, 142
Memento pad, 147
Diamonds, 156
Tricolor ribbon, 161
Dimensionals, 162
Glue Dots, 162
Old World Paper embossing folder, 185
Ice Cream Cone Card

Original by Patty Bennett
Attach the smaller embossed Blackberry Bliss card stock to the card base as shown.
Attach the designer paper to the Bumblebee card stock.
Lay the cone and scoops of ice cream on the designer paper in the order you want them to be and then start adhering them. There are dimensionals under all of these pieces, I put dimensionals at the top of the ice cream scoops only so that everything would be the same height.
Stamp and add the greeting using Blackberry Bliss ink. I didn’t put dimensionals under it, but I wish I had. I will on the next one.
Attach the Bumblebee/designer paper layer to the card base.
Add 5 or whatever odd number of sprinkles that you wish. I attached them with little tiny dots for glue.
I added a cone to the envelope and to the inside. I stamped the cones with Cinnamon Cider ink and then added the detail with Cajun Craze ink. I then glued an ice cream scoop that I punched out to each of those two cones.
Supplies used include:
Ice Cream Cone Suite, m 48
Good Morning Magnolia, 34
Blackberry Bliss card stock, 143
8 ½ x 5 ½
5 ¼ x 4
Bumblebee card stock, 143
4 ½ x 3 ¼
White card stock, #159276, $9.75 (new white card stock)
5 ¼ x 4
Ice Cream Corner designer paper, included in suite, 49
4 ¼ x 3 sprinkles or stripes
1 ½ x 1 ¾ scoops of ice cream, 6 each
6 x 2 3/8 stripes or sprinkles for envelope flap
Blackberry Bliss pad, 143
Cinnamon Cider pad, 143
Cajun Craze pad, 142
Ice Cream Cone punch, included in suite, m 49
Ice Cream Cone sprinkles, included in suite, m 49
Green Glue, 162
Dimensionals, 162
Old World Paper embossing folder, 185