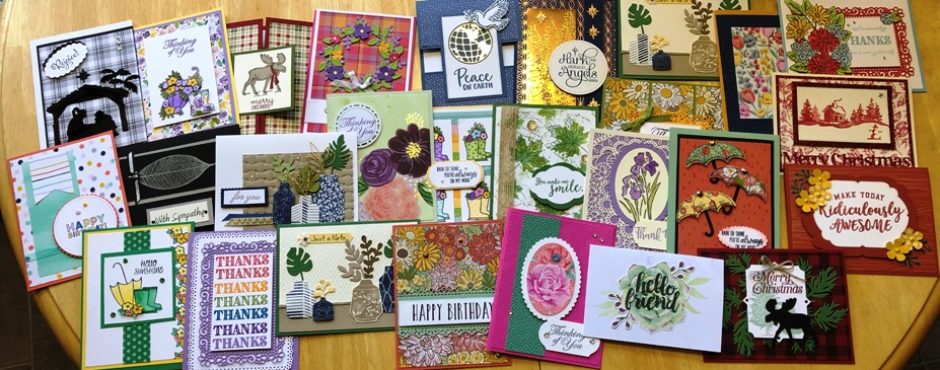
In our last post we gave you a preview of some beautiful cards. In this post we will give the directions and recipes. The page numbers refer to both the annual catalog and the most recent mini catalog (designated with an “m”). If you do not have these catalogs, contact me and I will be happy to send you a set. You can also click on my “Shop Now” tab and you will be connected with Stampin’ Up! website where you can view and order from both catalogs.
As a reminder, you will receive this package of 5 card kits when you place a $50 plus order during October. Many of you have already qualified.
For Unto Us Navy & Copper Card

Original by Linda Williamson
Isn’t this card beautiful?!?!
Please be careful as you remove the pieces from the envelope. There are lots of little pieces in a plastic bag.
It’s going to be really easy for you to assemble.
The copper foil has been run through the Big Boss using the Evergreen Forest embossing folder so all you need to do is to adhere it to the Brightly Gleaming designer paper. We put a piece of printer paper on top of the foil to keep it as perfect as possible–just a little tip.
There are dimensionals under the white circle. The little copper stars are attached with glue dots.
Products used include:
For Unto Us stamp set, m 35
Peaceful Nativity bundle, m 17
Night of Navy card stock, 142
Shimmery White card stock, 153
Copper Foil,153
Brightly Gleaming designer paper, 19
Night of Navy pad, 142
Diamonds, 156
Stitched Shapes dies, 183
Evergreen Forest embossing folder, m 35
World Peace on Earth Dove Card

Original by Bethany Barnard
Score the Misty Moonlight card stock at 5 ½”. You’ll then have a regular size card base and a short piece for the bottom.
Attach the designer designer series paper to the top piece (part of the card base) and also the extra piece of Misty Moonlight card stock. This piece becomes the bottom front of the card.
Then you can build the front piece of the card which attaches the bottom piece to the card base. The tip that I have is to be sure not to put adhesive on the entire front piece as you’ll just want it on each end.
Slip the world into the hole. You’ll probably want to use little bits of glue to hold it in.
The dove is attached to the card using dimensionals.
Products used include:
Beautiful World bundle, 26
Dove of Hope bundle, m 13
Misty Moonlight card stock, 143
Whisper White card stock, 143
Flowers for Every Season designer series paper, 148
Gold Foil, 153
Misty Moonlight pad, 143
Diamonds, 156
Dimensionals, 162
Stitched Rectangles dies, 183
Arrange a Wreath Birthday Melon Mambo Card

Original by Karen Logeman
This one is just as shown. Everything is cut for you. The embellishments are in a little plastic bag inside your envelope.
Adhere the designer paper to the white card base and then start building your wreath. Attach the wreath with little bits of glue on the leaves. Then add the flowers.
Attach the greeting piece. And add the jewels.
There’s a piece of white ribbon in your bag of embellishments. Tie and bow and attach it with glue dots.
Products used include:
Arrange a Wreath bundle, 127
Here’s a Card stamp set, 39
Melon Mambo card stock, 142
Whisper White card stock, 143
Granny Apple Green card stock, 142
Highland Heather card stock, 143
Gorgeous Grape card stock, `142
Mango Melody card stock, 142
Flowers for Every Season designer paper, 148
Gorgeous Grape pad, 142
Mango Melody pad, 142
Melon Mambo pad, 142
Diamonds, 156
Gold Glitter Enamel Dots, 157
Crinkled Seam Binding ribbon, 161
Toile Snow Wonder Card

Original by Anne Wallace
This card is very easy. You’ll just need to assemble it.
Attach the two pieces of designer paper to the Real Red card base.
Add the Wrapped in Texture piece of Real Red card stock.
Stamp greeting on to Very Vanilla piece and sponge the edges with Real Red pad. Attach it.
Add the two Wonderful Gems.
Products used include:
Snow Wonder stamp set, m 39
Itty Bitty Christmas stamp set, 62
Real Red card stock, 142
Very Vanilla card stock, 143
Toile designer paper, m 34
Real Red pad, 142
Wrapped in Texture embossing folder, m 9
Wonderful Gems, m 31
Sponge, 147
Banners Pick a Punch, m 65
Peaceful Boughs Card

Original by Brian King
Attach the embossed piece of Crumb Cake card stock to the card base. (The reason we give you this extra piece is that after card stock is embossed, it becomes more easily torn.)
Assemble the Cherry Cobbler and designer paper layer and adhere to Crumb Cake piece using dimensionals.
Stamp your circle with a stamped off branch or other stamp of your choice and then stamp your greeting. Attach it to the designer paper as shown.
Use glue to attach the bough.
It can certainly be used as a masculine card if you wish.
Products used include:
Peaceful Boughs bundle, 57
Blossoms in Bloom stamp set, 51
Crumb Cake card stock, 142
Cherry Cobbler card stock, 142
Plaid Tidings designer paper, 142
Whisper White card stock, 143
Shaded Spruce card stock, 142
Cherry Cobbler pad, 142
Shaded Spruce pad, 142
Green Glue, 162
Dimensionals, 162
1 ½” Circle Punch, 165
Stitched Shapes dies, 183
